Setup guide — Raspberry Pi · Linux · Python

Pi setup,
step by step

From a blank SD card to a running race screen: flash Raspberry Pi OS with Raspberry Pi Imager, log in via SSH, clone the repository and open the timer on the iPad.

Before you start

What you need

This guide covers the software side. The track modification and the sensor wiring are described on the product page — you can do them before or after this guide, but the Pi should be powered off while you connect the sensors.

Time needed: roughly 30 minutes, most of it waiting for downloads and the first boot.
  • 1×Raspberry Pi with 40-pin headerPlus official power supply
  • 1×microSD card, 16 GB or moreClass 10 / A1 or better
  • 1×SD card readerUSB, or the one built into your computer
  • 1×Computer (Windows, macOS or Linux)For flashing and for the SSH session
  • 1×Network: Wi-Fi or Ethernet cableThe Pi and the iPad must be in the same network
The Setup

14 steps.
One race screen.

  1. Download Raspberry Pi Imager from raspberrypi.com/software and install it. It downloads the operating system for you and lets you preconfigure the Pi, so no separate image download and no manual file editing are needed. Insert the SD card into your computer.

    Prefer balenaEtcher? See the alternative below.

    [PLACEHOLDER: Imager version you used]


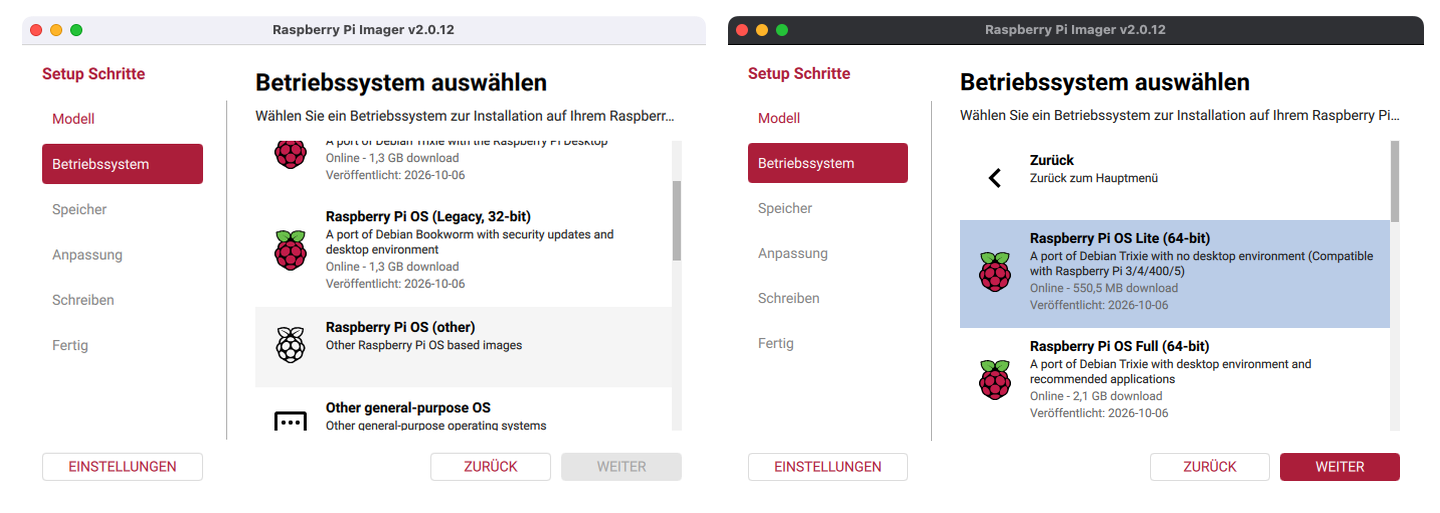
  2. Select your Raspberry Pi model, then under Operating System choose either Raspberry Pi OS (64-bit) if you want to have a desktop for your PI, or Raspberry PI OS (other) then Raspberry PI OS Lite (64-bit). The Lite variant works too, since the race screen runs on the iPad. Want to use a monitor and keyboard on the Pi? Pick the desktop edition. Under Storage select your SD card — check the size and name twice, everything on it is erased.

    In my setup I use Raspberry Pi OS Lite (64-bit)

    Raspberry Pi Imager OS selection
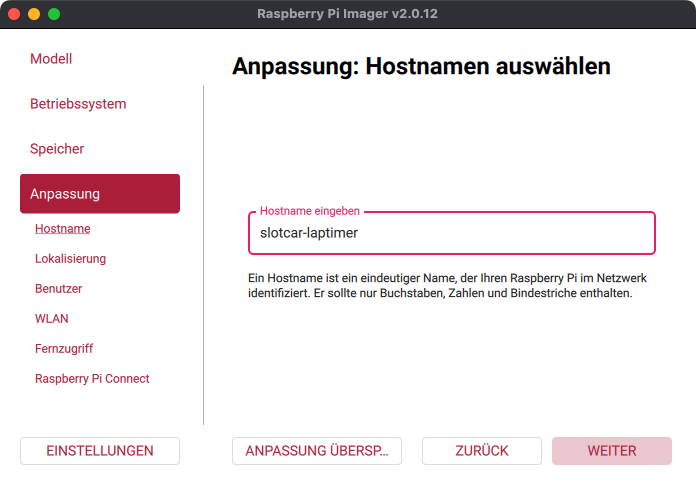
  3. When Imager asks Would you like to apply OS customisation settings?, choose Edit Settings and set:

    • Hostname, e.g. slotcar-laptimer
    • Username and password
    • Wi-Fi name, password and country (skip when using Ethernet)
    • Services → Enable SSH with password authentication

    Write down hostname, user and password — you need them in the SSH step as well as when accessing the laptimer via the tablet later.

    Wording may differ slightly between Imager versions.

    Raspberry Pi Imager customisation dialog
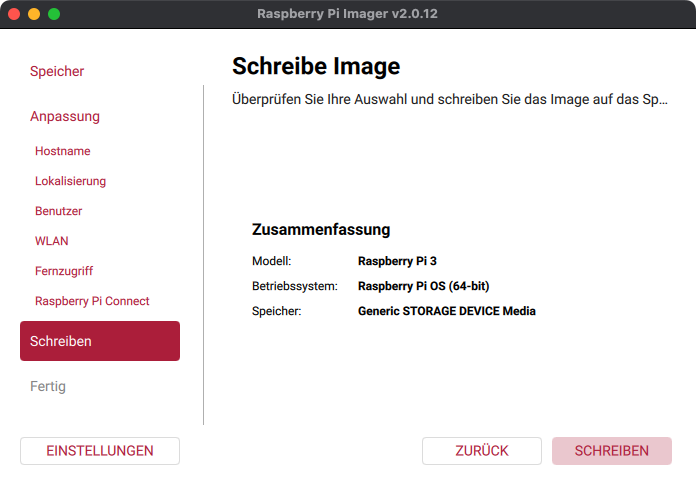
  4. Confirm with Save and Write, accept the erase warning and the admin prompt. Imager writes and verifies the card. Wait for the success message before you remove it.

    for me the process took ~2 minutes for a 16GB micro SD card

    Raspberry Pi Imager showing Write Successful
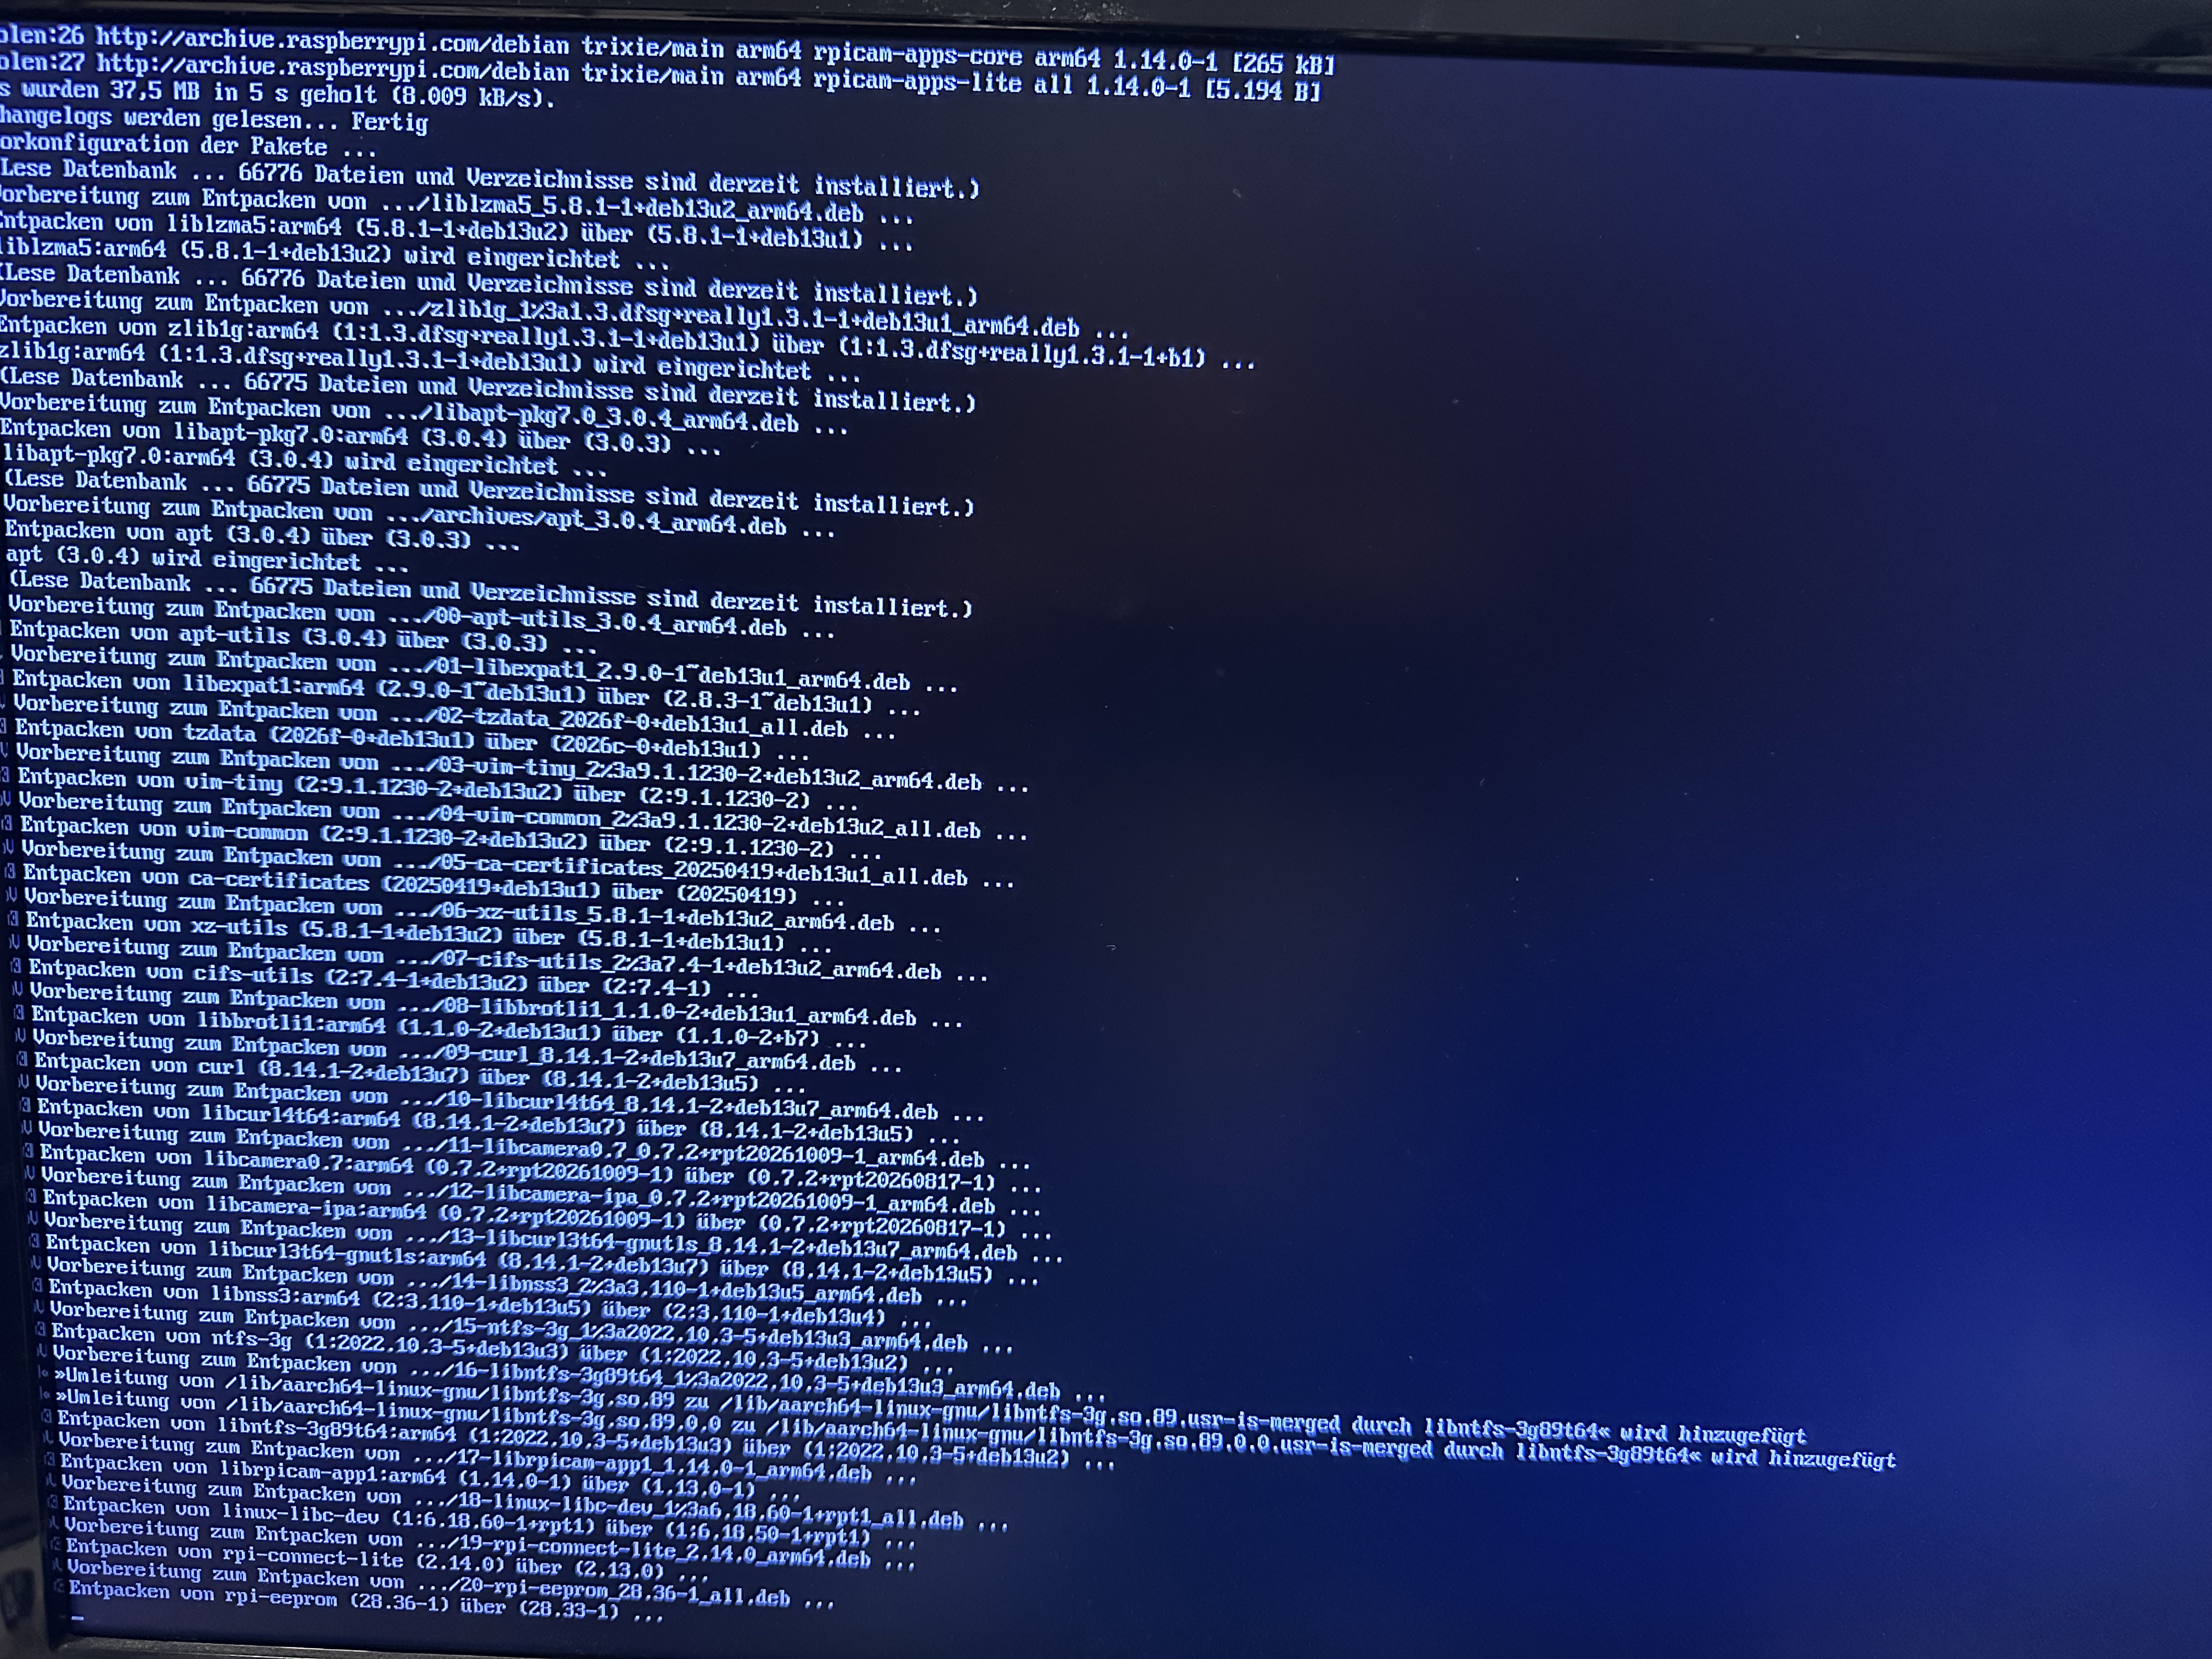
  5. Eject the card, put it into the Pi and connect the power supply. The first boot takes a few minutes because the file system is expanded and the system configures itself. Do not unplug the Pi during that time.

    If connected to a monitor and keyboard, you will see the boot process and can log in directly. Startup takes about 1 minute.

    Raspberry Pi with SD card inserted and power connected
  6. Look up the IP address of the Pi in the device list of your router, or try the hostname directly. You need the address later for the iPad as well. Using a screen on the Pi? Skip steps 06 and 07 — see the alternative below.

    [PLACEHOLDER: hostname you set / router screenshot]

    ping <hostname>.local
    I use 'pi' as user and 'slotcar-laptimer' as hostname
    # ping pi@slotcar-laptimer.local

  7. Open a terminal (Windows: PowerShell) and connect with the user you configured.

    ssh <user>@<hostname>.local
    # or: ssh <user>@<ip-of-your-pi>
    # A missing hostkey warning may appear the first time you connect via SSH.
    Acceptby writing 'yes'

  8. Bring the freshly flashed system up to date. This can take a few minutes; reboot afterwards if the update asks for it.

    sudo apt update
    sudo apt full-upgrade -y

  9. Only the tools to fetch the code and to build the Python packages are installed system-wide. The GPIO library (rpi-lgpio) compiles a small C extension, so swig and liblgpio-dev are required — without them the install in step 11 fails with command 'swig' failed. Flask and rpi-lgpio themselves come from the project's requirements.txt in a later step.

    sudo apt install -y git swig python3-dev python3-venv liblgpio-dev build-essential

  10. Clone the Slotcar Laptimer repository into your home directory. Prefer a fixed version? Download a release from the releases page instead.

    cd ~
    git clone https://github.com/berny-pe/slotcar-laptimer.git
    cd slotcar-laptimer
    ls
    # You should see a list of files cloned from the repository,
    containing README.md and other project files

  11. Create a virtual environment inside the project and install everything from requirements.txt (Flask and rpi-lgpio, a drop-in replacement for RPi.GPIO). A virtual environment is required because current Raspberry Pi OS refuses system-wide pip installs. The build of rpi-lgpio takes a minute or two.

    python3 -m venv .venv
    source .venv/bin/activate
    pip install -r requirements.txt

  12. Start the app. It serves the race screen via a built in webserver you can access in your network on port 5000.

    You should now see the python software exposing the address of the webserver.

    source .venv/bin/activate   # if not active anymore
    python SlotcarLapTimer.py
    # Output:
     * Serving Flask app 'SlotcarLapTimer'
     * Running on all addresses (0.0.0.0)
     * Running on http://127.0.0.1:5000
     * Running on http://172.16.1.6:5000

  13. Open the shown address in Safari on the iPad or any other browser on your tablet, while it is in the same network as the Pi. Tip: add it to the home screen for a full-screen race display.

    [PLACEHOLDER: screenshot of the race screen]

    http://<ip-of-your-pi>:5000

  14. Power the Pi off, connect the sensors as described in the wiring section, power on again and start the app. Pass a finger through each slot — the lap counter of the matching lane must increase.

    [PLACEHOLDER: what you see; what to check if nothing happens]


Alternative: flash with balenaEtcher

Etcher only writes the image — unlike Raspberry Pi Imager it has no customisation dialog. Do these instead of steps 01–04, then continue with step 05.

  1. Download Raspberry Pi OS

    Download the 64-bit image (.img.xz) from raspberrypi.com. Do not unpack it.

  2. Install balenaEtcher

    Get it from etcher.balena.io.

  3. Select image and SD card, then flash

    Flash from file → the .img.xz, Select target → your SD card (check twice, it is erased), then Flash! and wait for Flash Complete.

  4. Enable SSH and Wi-Fi (headless)

    Re-insert the card; it shows up as bootfs. Add the SSH, user and Wi-Fi configuration to this boot partition, or connect a monitor and keyboard and configure on the Pi.

Alternative: Raspberry Pi OS with desktop and a screen

If you have a monitor, keyboard and mouse, you can skip the network lookup and SSH. Do this instead of steps 06 and 07, then continue with step 08.

  1. Choose the desktop edition when flashing

    In step 02 pick Raspberry Pi OS (64-bit) — the edition with desktop. It needs a bit more space and time to write than Lite; the customisation settings from step 03 still apply. Enabling SSH is then optional.

  2. Connect screen, keyboard and mouse

    Before the first boot (step 05) connect the monitor via micro-HDMI/HDMI, plus keyboard and mouse. The desktop appears after the first boot; if you did not preconfigure it, the welcome wizard asks for country, user and Wi-Fi.

    [PLACEHOLDER: screenshot of the desktop]

  3. Open a terminal on the Pi

    Click the Terminal icon in the taskbar (or press Ctrl+Alt+T) and run the commands of the following steps directly there. Read the IP address of the Pi for the iPad with:

    hostname -I
When it doesn't work

Troubleshooting

SSH: connection refused / host not found

In case you can't find the hostname, make sure you have configured Wi-Fi correctly and enabled SSH on the Raspberry Pi. Check your router for connected devices and verify the Pi's IP address. Check the network settings of the device you are trying to connect from.

Race screen does not load on the iPad

Verify you opened the correct URL on the iPad and that the Raspberry Pi is connected to the same network. Check that the Pi's IP address is correct and ensure the app is running properly via PI's console. When accessing the slotcar laptimer you will see entries in the access log on console (when debug mode is set to true in config.py)

Install fails with "command 'swig' failed"

The build tools from step 09 are missing. Run sudo apt install -y swig python3-dev liblgpio-dev and repeat pip install -r requirements.txt inside the virtual environment.

Start fails with "Failed to add edge detection"

You are using the old RPi.GPIO package, which does not work on current Raspberry Pi OS. Run pip uninstall RPi.GPIO and pip install -r requirements.txt to get rpi-lgpio. Also make sure only one instance of the app is running.

No lap is counted

Verify you configured your sensors to the correct PINs on the Raspberry Pi and that they are properly connected. Try pressing the lap buttons on the iPad and see if the app registers a lap in general.

Still stuck?

Open an issue in the GitHub repository and include the output of the failing command.